A hometown friend sent me his dead Alpine MRP-F250 car amplifier after seeing my electronics posts on Facebook. The amp had blown power supply MOSFETs, and the repair attempt has turned into a deep education in systematic diagnostics, test equipment, and knowing when to stop and think before applying more power. Still in progress — the amp isn’t fixed yet, but I’ve learned more from this one project than I expected.
The situation#
One day, I posted about having one AI talk to another AI in the context of my Ma Bell Bluetooth Gateway project, and not long after I got a private message from a hometown Facebook friend. He had a car amp that failed — there was a pop and a burning smell — and since it looked like I was into electronics, he wondered if I might want to have a look. I clarified that I’m not an expert repair tech, but I’d be highly interested in the challenge as long as we agreed there was nothing to lose. Challenge accepted. He sent me the amp and I was ready to dig in.
What I tried#
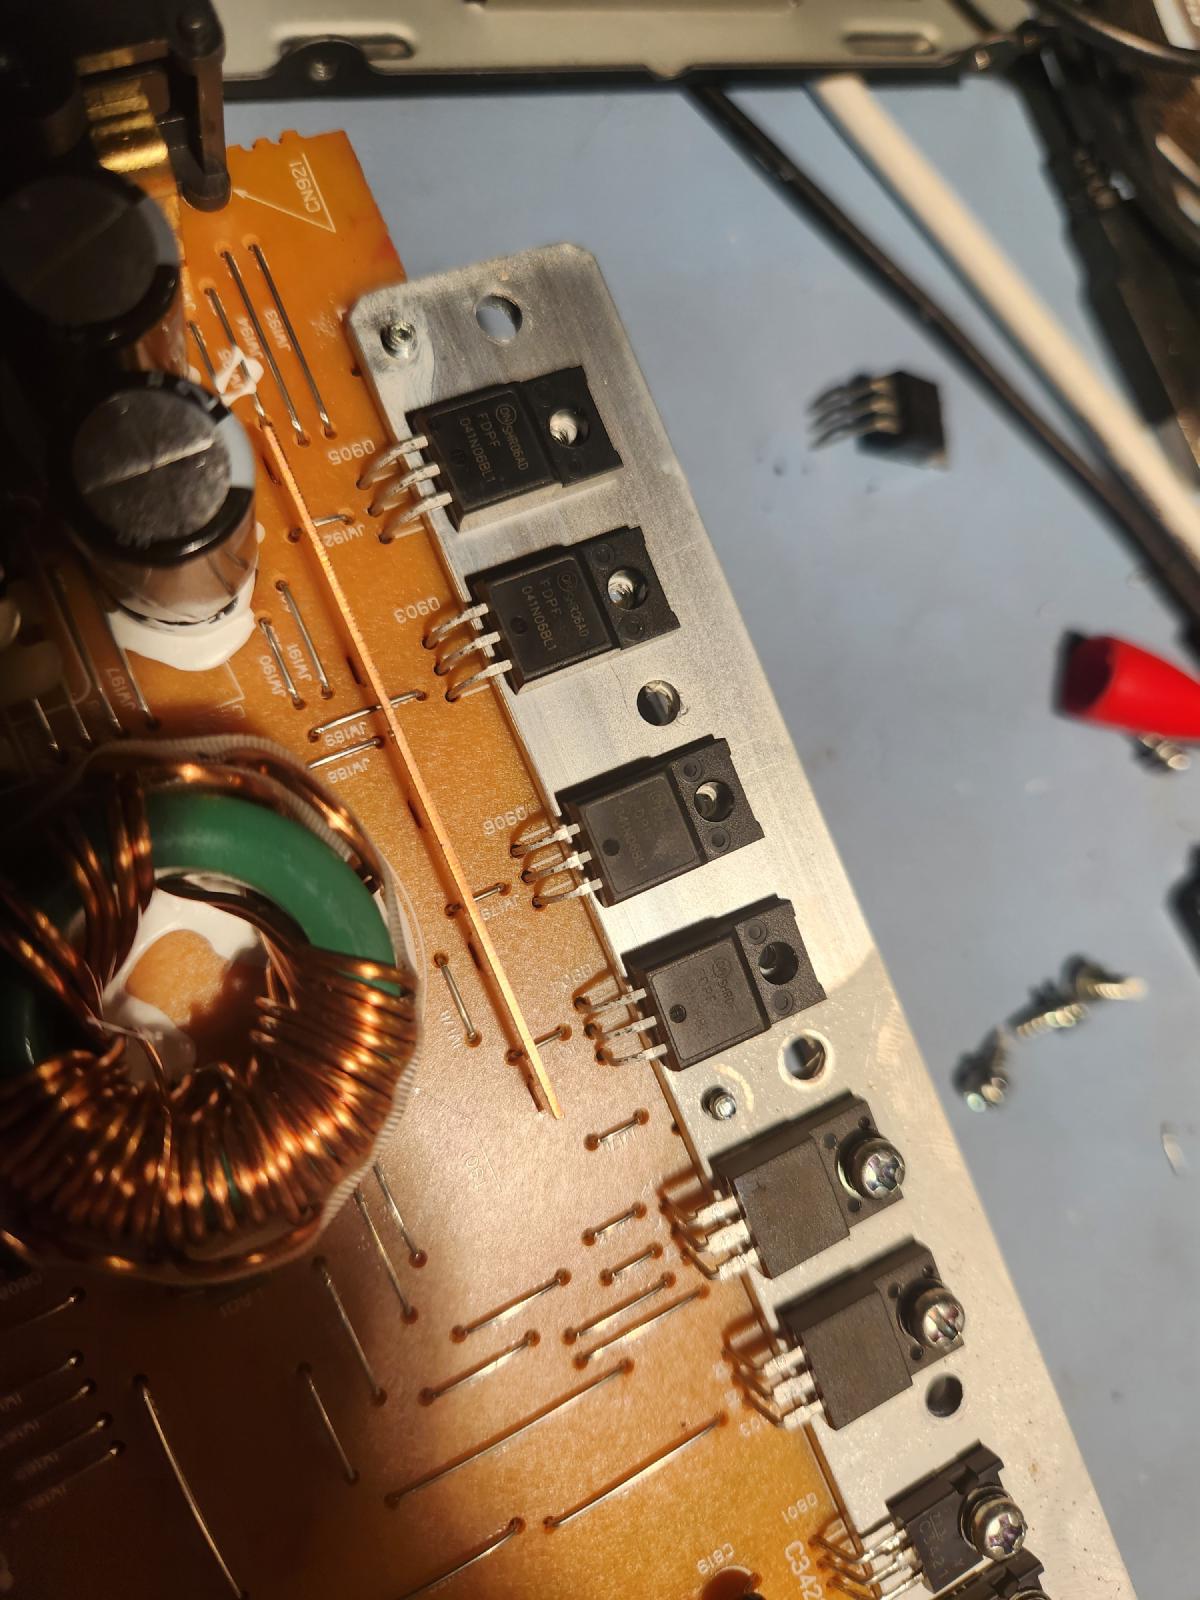
I ordered the service manual for the exact amp and fed it into ChatGPT to assemble a diagnostic, test, and repair plan. From this I was able to identify two shorted MOSFET transistors in the power supply — consistent with the reported pop and burning smell. I ordered substitute transistors (all four, per recommendation) and replaced them. Before powering up, I watched quite a few repair videos from BareVids, who has explicitly stated that when power FETs fail there’s usually something else going on. I tested the PWM driver circuits with my oscilloscope and confirmed — to the best of my knowledge — that they were producing the pulses the FETs needed. So I proceeded to test the amp with limited current.
What surprised me#
My bench power supply immediately dropped to around 8 volts. That should have been the immediate signal to abort and start testing. Instead, I increased the current trying to get it back to 12V. Nothing happened immediately, so I thought — better power it down and have a think. But then I remembered I should try thermal imaging to see if anything was running hotter than normal. Since there had been no consequence before, I powered it back on to look through the thermal camera. Poof! Scared the crap out of me and a bit of smoke filled the bench area. Back to the drawing board with a more robust plan.
Result#
No matter what happens with the amp in the end, I will have learned a lot. I haven’t given up — this experience actually triggered a much more comprehensive diagnostic and test plan as well as a deep dive on using test equipment, which somehow resulted in assembling the EE Notebook. I’ll pull the four FETs again, retest the PWM driver circuits, and start back at the beginning. After seeing the condition of amps repaired by BareVids, this one seems in much better shape, so I believe repair is possible given the right approach. But the challenge still feels like finding a needle in a haystack.
Takeaways#
- When the bench supply voltage drops unexpectedly, stop — that’s the circuit telling you something is still wrong
- Replacing the obvious failed components isn’t enough; as BareVids warns, when power FETs fail there’s usually an underlying cause
- Feeding the service manual into AI to develop a diagnostic plan was a productive starting point, but no substitute for systematic fault isolation
- This repair directly led to assembling the EE Notebook and its debugging methodology — ask better questions before taking more measurements